Getting Started
FAQs
Unlike server-side plugins, Cimo processes everything in your browser. No external APIs, no server processing, no waiting – just instant optimization as you upload.
When you upload an image into your Media Manager (let’s say a .jpg), you’ll notice that after uploading, it will be a .webp image! You will also find some additional information in the Media Manager about your uploaded image.
Cimo works in all modern browsers including Chrome, Firefox, Edge, and Opera. This currently does not work with Safari, please use one of the browsers mentioned. If you use Safari, the image will just upload as it normally would.
Yes! Unlike other plugins that charge per image or have monthly quotas, Cimo’s image optimization and compression is completely unlimited and free forever.
No! Cimo processes everything locally in your browser. Your media assets never leave your device until they’re uploaded to your WordPress site, nor do they go to another server for processing.
Our browsers right now are quite powerful and already have the capabilities for converting images to different formats.
At the very core, the conversion is done via a clever use of JavaScript’s Canvas API to process your images in the browser right before they’re uploaded to WordPress.
This means faster uploads, no server load, and complete privacy.
Currently WebP conversion is fully supported.
Currently, Cimo optimizes images during the upload process. For existing images, you can re-upload them to get the optimization benefits.
Documentation for Cimo
Cimo comes in 2 flavors, Cimo free (the one available in the WordPress plugin directory), and Cimo Premium (the one you get after you purchase). In order to see and use the premium features of Cimo, you will have to have Cimo Premium to be activated in your WordPress site.
After purchasing Cimo Premium, you will be able to get your Cimo Premium plugin and your license key in 2 ways:
- Inside the purchase confirmation email, you will find the download link to the Cimo Premium plugin file, alongside your license key.
- Near the top of the website, navigate to Account and log into the user dashboard using the email address you used during your purchase.
Install the Cimo Premium plugin in your WordPress site. Note that you do not need the free version of Cimo once you have the premium version activated.
You will know if you have activated the correct plugin if you head over to your plugins admin page, then scroll down to the entry for Cimo. You should see it labeled as “(Premium)”.

After installing and activating Cimo Premium, you will need the also activate your license key in order to unlock the premium features such as video optimization and audio optimization.
Activating Your License Key
After purchasing Cimo Premium or the All Access Pass, you will be given a license key. This license key is used to activate the premium features of Cimo, such as video optimization, audio optimization and premium plugin updates.
Once you have your license key at hand (check the previous section on how to get your license key), activate the Cimo Premium plugin in your WordPress website.
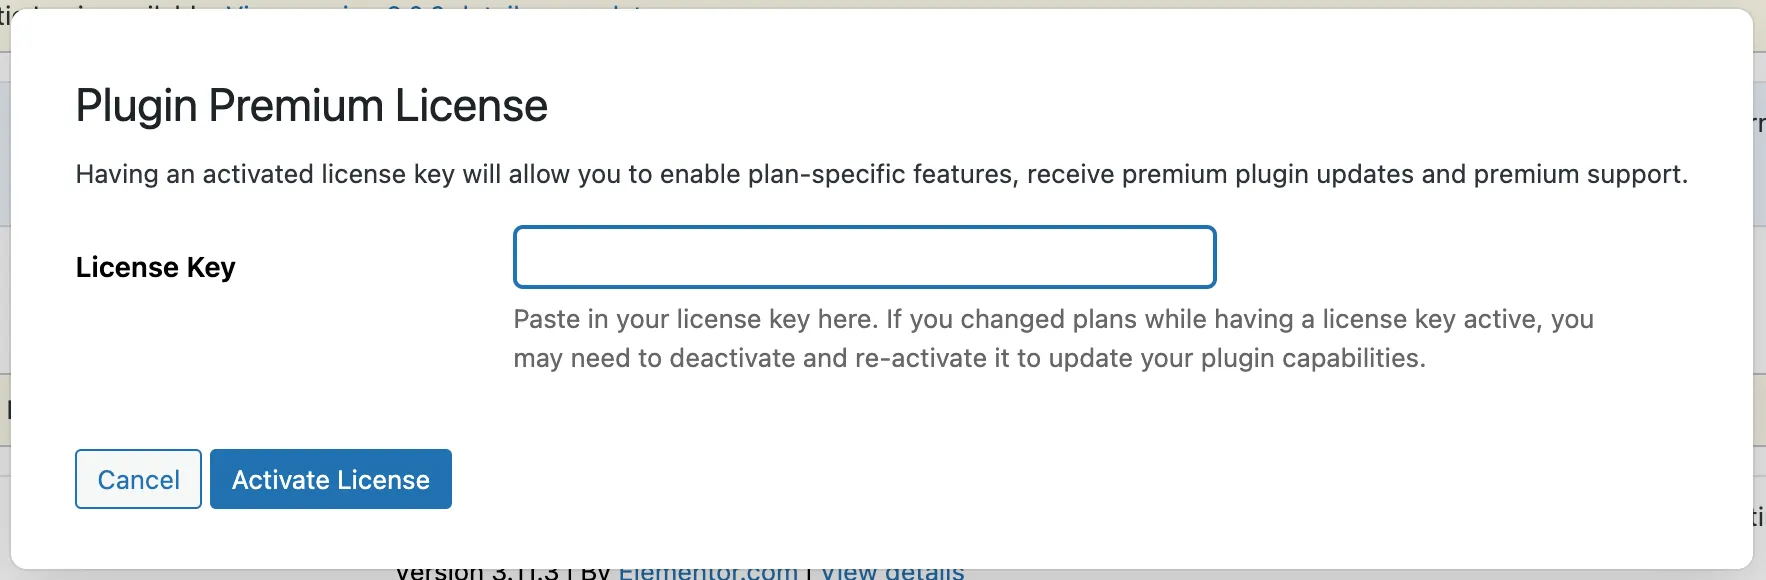
After activating Cimo Premium, you should be able to see an admin notice about activating your license key, click on the Activate License Key button.

A popup modal should appear. Enter your license key then click on the Activate License button.
Alternatively, head over to your plugins admin page then scroll down to the entry for Cimo. Click on the link below the plugin name that says Activate License Key, then enter your license key and follow the prompt that appears.

You will know that you have your license key correctly activated if you see the link change to Manage License Key.

Image Optimization
Cimo automatically optimizes your images as soon as you upload them. When working inside the WordPress Block Editor, simply insert a Native Image Block and upload your image to the Media Library. Cimo will instantly convert the file to .webp format for improved performance.
To verify that an image has been optimized, open the image in the Media Library and check the information panel on the right. If optimization is successful, you will see an “Image Optimized by Cimo” notice.
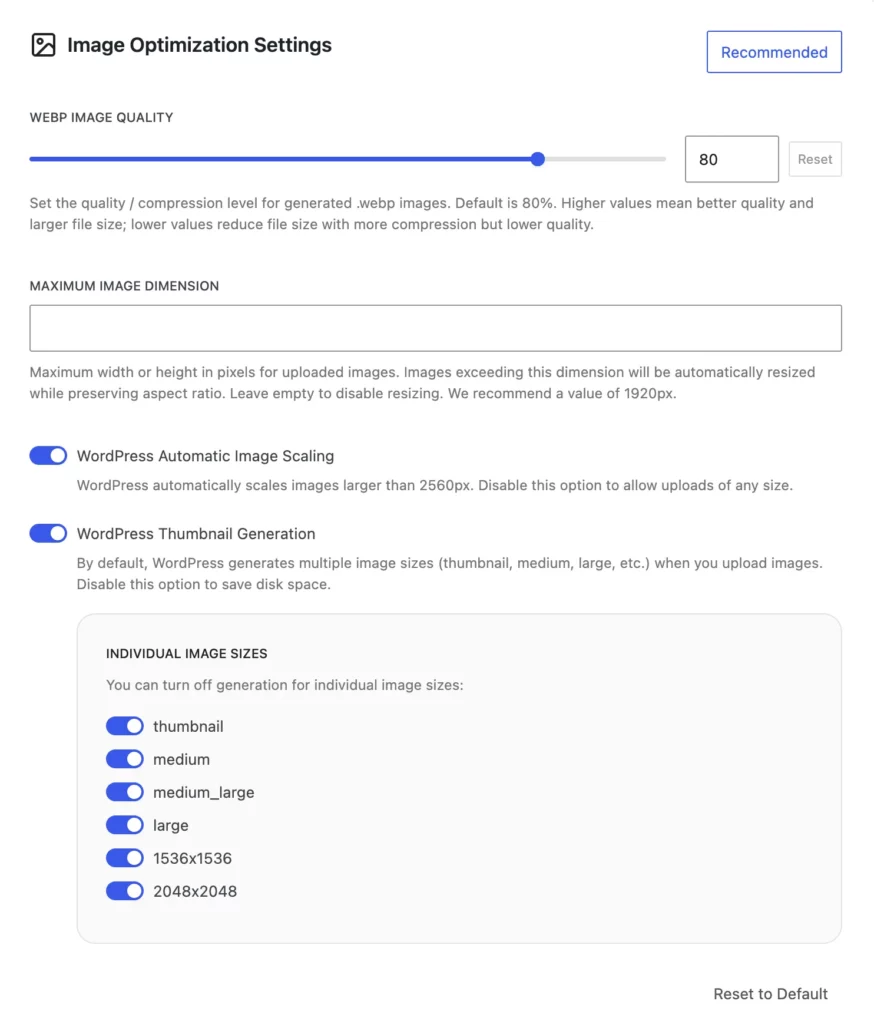
The Image Optimization Settings give you control over how images are handled when you upload them to WordPress.
💡 You can click on the Recommended button for a preset of our recommended settings for Image Optimization.
The WebP Image Quality option lets you set the compression level for generated .webp images. The default value is 80%. A higher value keeps more detail but produces a larger file size, while a lower value reduces the file size at the cost of image quality.
The Maximum Image Dimension setting lets you define the maximum width or height (in pixels) for uploaded images. Any image that exceeds this value will be automatically resized while preserving its aspect ratio. If you want to disable resizing, you can leave this field empty. We recommend using 1920px for optimal performance and display quality.
WordPress Automatic Image Scaling controls whether WordPress should automatically scale down images that are larger than 2560px. If you prefer to upload images at their original size without WordPress reducing them, you can turn this option off.
WordPress Thumbnail Generation can be disabled if you want to prevent WordPress from creating multiple image sizes during upload, which helps save disk space. For finer control, you can individually disable the generation of specific image sizes, including thumbnail, medium, medium_large, large, 1536×1536, and 2048×2048. This is helpful if you don’t really use resized image sizes.
If you want to revert your changes, you can use Reset to Default button to restore all image optimization settings to their original values.
Video Optimization
Cimo automatically optimizes your videos as soon as you upload them. When working inside the WordPress Block Editor, simply insert a Native Video Block and upload your video to the Media Library. Cimo will instantly convert the file to .mp4 format for improved performance.
To verify that a video has been optimized, open the video in the Media Library and check the information panel on the right. If optimization is successful, you will see a “Video Optimized by Cimo” notice.
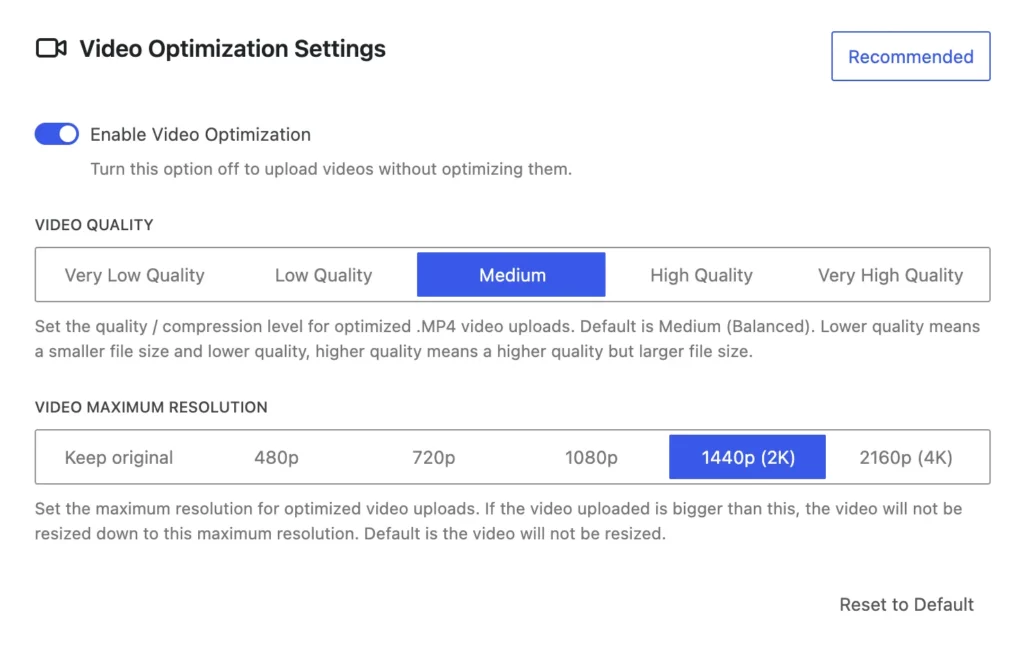
The Video Optimization Settings let you control how your video uploads are processed. You can enable or disable Video Optimization depending on whether you want your videos to be optimized during upload. If you turn this option off, videos will be uploaded without any optimization.
💡 You can click on the Recommended button for a preset of our recommended settings for Video Optimization.
You can adjust the Video Quality setting to choose the compression level for optimized .MP4 files. The default quality setting is Medium (Balanced). Lower quality settings produce smaller file sizes with reduced quality, while higher quality settings provide better visual output but result in larger file sizes.
You can also set a Video Maximum Resolution. This determines the highest resolution allowed when optimizing your uploads. If the uploaded video exceeds the selected resolution, it will be resized down to the max resolution while preserving the aspect ratio. By default, videos are not resized.
If you want to revert your changes, you can use the Reset to Default button to restore all video optimization settings back to their original values.
Audio Optimization
Cimo automatically optimizes your audios as soon as you upload them. When working inside the WordPress Block Editor, simply insert a Native Audio Block and upload your audio to the Media Library. Cimo will instantly convert the file to .mp3 format for improved performance.
To verify that an audio has been optimized, open the audio in the Media Library and check the information panel on the right. If optimization is successful, you will see an “Audio Optimized by Cimo” notice.
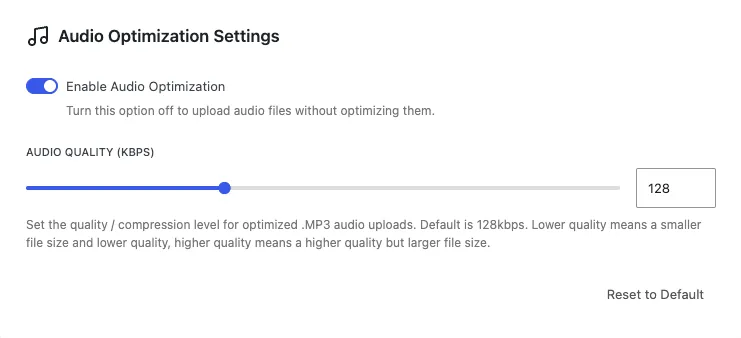
The Audio Optimization Settings let you manage how audio files are processed during upload.
The Enable Audio Optimization toggle determines whether your audio files should undergo compression when uploaded. If you prefer to keep the original file untouched, this option can be switched off.
Under Audio Quality (kbps), you can choose the bitrate used for optimized .mp3 files. The default value is 128 kbps, which provides a balance between quality and file size. Selecting a lower bitrate reduces the file size but also lowers the audio quality, while choosing a higher bitrate produces better sound with a larger file size.
If you want to revert your changes, you can use the Reset to Default button to restore all audio optimization settings back to their original values.
Low-Quality Image Placeholder
The Low Quality Image Placeholder (LQIP) settings define how loading visuals are displayed before the full image appears.

When Enable LQIP is switched on, supported images will display a low-resolution placeholder before the final image loads. This feature works only with Native Image Blocks and is disabled by default.
The Placeholder Pulse Speed option lets you set how quickly the pulse animation of the placeholder plays. The default timing is 2.5 seconds.
With Placeholder Pulse Brightness, you can adjust how bright the pulse effect appears during loading. The standard value is 1.3× brightness.
The Image Fade In Duration setting controls how long the transition takes when the full image replaces the placeholder. By default, this fade-in lasts 0.5 seconds.
If you want to revert changes, you can use the Reset to Default button to restore all LQIP settings back to their original values.
How to know if my file was optimized?

You can confirm whether a file has been successfully optimized by opening it in the WordPress Media Library. In the information panel on the right, look for the notice “Image/Video/Audio Optimized by Cimo.” If this message appears, the file has been optimized.